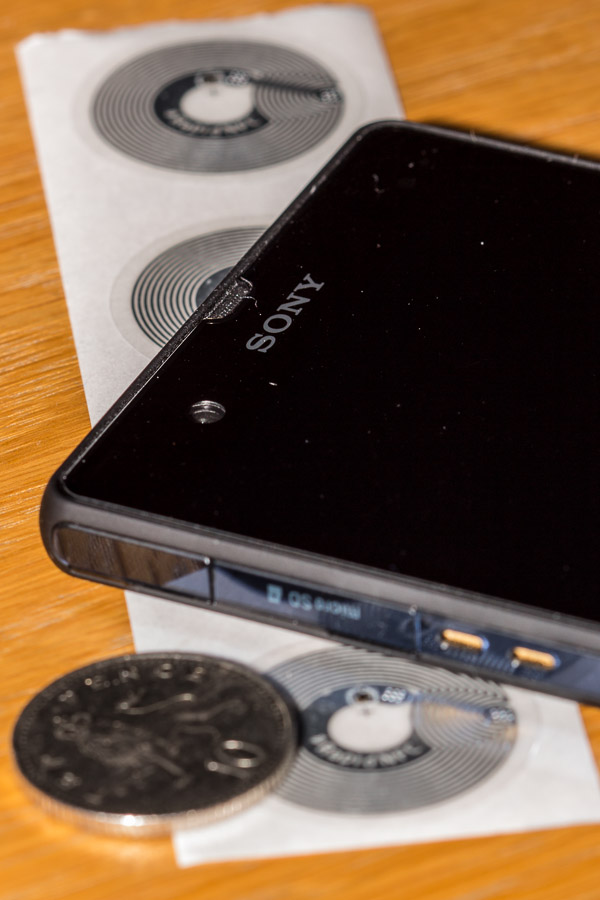
 It’s been a while since I posted anything so it’s fitting this’ll be a long one! I recently got a Sony Xperia Z to replace my old LG Optimus 2X. Along with it’s great screen, waterproofing and vast speed, it has NFC. With work I am driving to various client sites and it’s an increasingly common occurrence to receive phone calls while driving. As I have no hands free kit I always used to take these calls using the speakerphone, requiring a swipe and then poke to answer the call.
Having been inspired by a work colleague using NFC to enable work mode on her phone, I thought I should use this to have a more robust car mode. Many of the newer Android phones already have a car mode which removes the need to swipe to answer and defaults to answering on the speakerphone. This can be turned on via tasker. However it would be just as simple to press the home screen icon if this was all that I wanted.
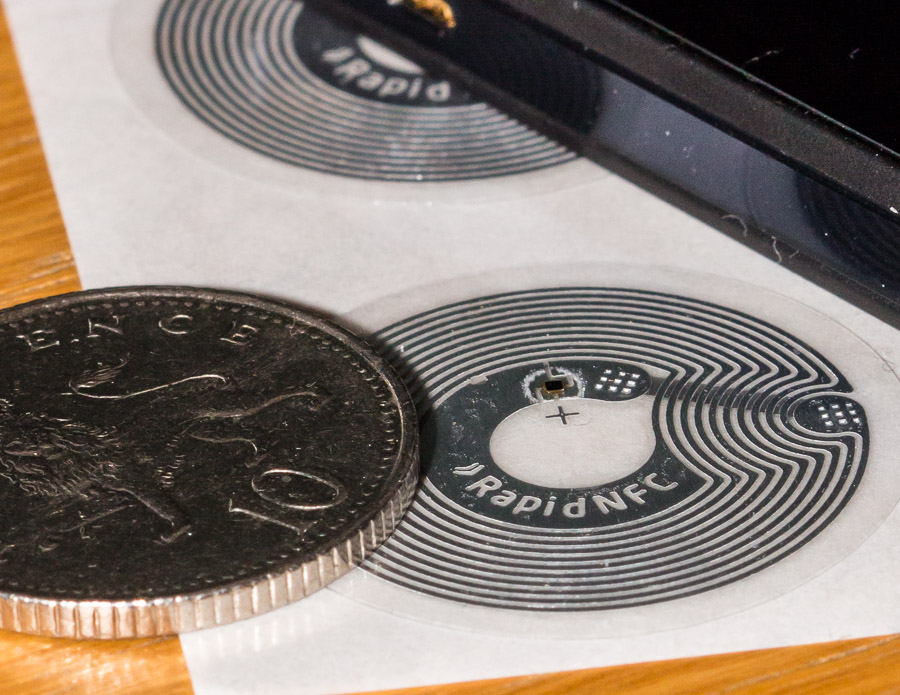
I bought some clear RapidNFC tags from Amazon, delivery was fast and well packaged.
It’s worth noting that on my phone sometimes the task and profile names will differ slightly from those stated here, so if your screen doesn’t look exactly the same as the screenshots don’t panic!
Additional features
From previous posts, I’ve included auto responses from SMS and an automated work mode (based on time). I wanted to have the SMS functionality within car mode but not disrupt work mode when out of the car. The profiles have been tweaked to work with the new phone and some redundancy has been added to cope with car mode (ie speakerphone off).
Quick reminder for work time:
| Profile Name | Work Mode | Normal Mode |
| Profile Active? | Active | Inactive |
| Context: | Mon,Tue,Wed,Thu,Fri 8:25 till 18:00 |
Sat,Sun |
| Task |
Task Name: Work Time
|
Task Name: Normal Time
|
| Closing Task |
|
|
Work time integration
I set up an additional profile which matches the contexts for Work Time but the opening task is simply:
Variable Set [ Name:%WORKTIME To:1 Do Maths:Off Append:Off]
and the closing task:
Variable Clear [ Name:%WORKTIME Pattern Matching:Off ]
These set the %WORKTIME variable (which has to be all capitals) to 1 whenever it is work time and clears the variable when it’s not. This will allow the car mode to reset back into the appropriate setup when it’s exited.
Auto response integration
The context of the profile has been simplified to be Event: Received SMS. There is no longer a requirement for Copilot detection or power source detection as this profile will be normally be inactive until activated as part of car mode. This profile is now called SMS Car Mode.
CALLS car mode setup
The context for car mode is Variable Value %CARMODE matches 1. Once the switch has been set up this allows the car mode to be permanently active. This profile is called CALLS Car Mode.
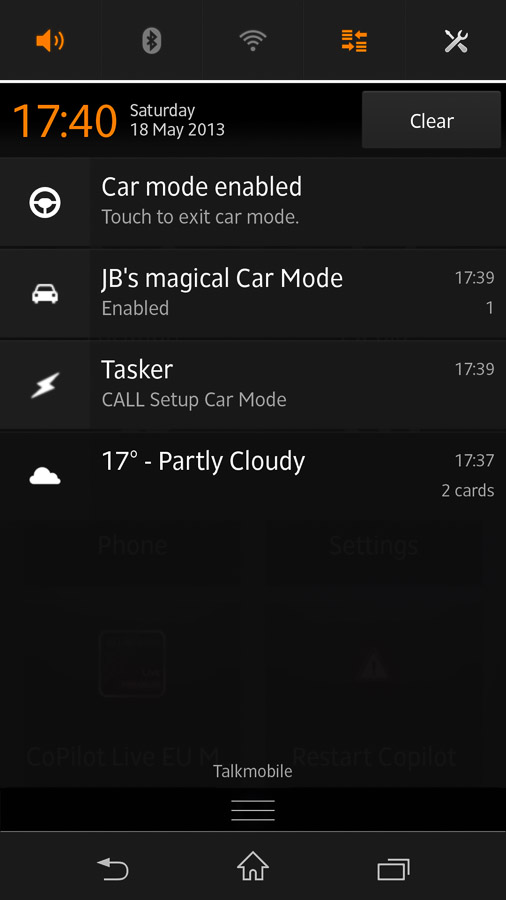
Notify [ Title:JB's magical Car Mode Text:Enabled Number:1 Permanent:On Priority:3 ]Profile Status [ Name:Work Mode Set:Off ]Car Mode [ Set:On Go Home:Off ]Speakerphone [ Set:On ]Wait [ MS:0 Seconds:10 Minutes:0 Hours:0 Days:0 ]In-Call Volume [ Level:5 Display:Off Sound:Off ]Ringer Volume [ Level:5 Display:On Sound:Off ]Media Volume [ Level:12 Display:Off Sound:Off ]
The notification reminds me that car mode is active. Work mode is disabled so that, for example, at 18:00 if I’m driving my phone doesn’t switch into ‘normal’ mode. The phone’s built in car mode enables simple one poke answering with speakerphone enabled (the speakerphone on is incase the built in car mode got disabled accidently*).
My current phone holder often presses the volume down button as it’s gripping the phone so the 10 second delay allows me chance to secure the phone in the holder and stop pressing the volume button. The volumes are then reset to hear incoming calls (ringer), sat nav (media) and speakerphone (in-call). Due to the fact that the volume often gets lowered when attaching to the screen, I felt it was reassuring if one of the volume changes is displayed onscreen so that you can see that the volumes have increased to what they should be.
*I suspect the chances of accidentally exiting car mode when driving is extremely low but during testing, in my flat, I was jumping in and out of tasker/settings windows and sometimes it would close unexpectedly.
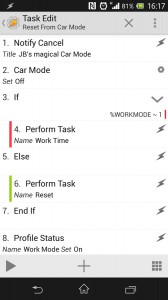 Car mode exit task
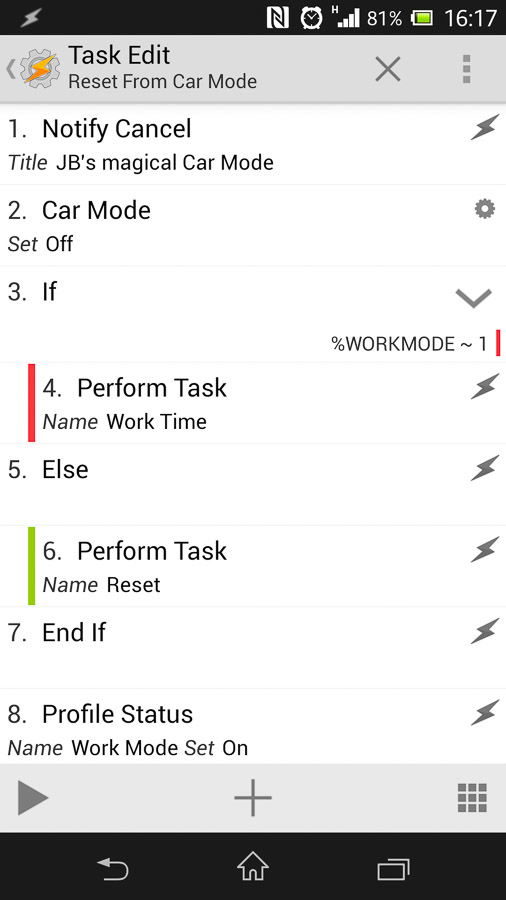
Notify Cancel [ Title:JB's magical Car Mode Warn Not Exist:Off ]Car Mode [ Set:Off Go Home:Off ]If [ %WORKMODE ~ 1 ]Perform Task [ Name:Work Time Stop:Off Priority:5 ]ElsePerform Task [ Name:Normal Time Stop:Off Priority:5 ]End IfProfile Status [ Name:Work Mode Set:On ]
This is where the work mode intregration comes in… on exiting car mode it runs the correct task depending on whether it should be work time or normal time. This is possibly acting as redundancy as reactivating the profile should set these again but due to the critical importance of work mode being set, I deemed it worthwhile.
NFC toggling
To enable toggling, set up a named task with the following:
Profile Status [ Name:CALLS Car Mode Set:Toggle ]Profile Status [ Name:SMS Car Mode Set:Toggle ]- V
ariable Set [ Name:%CARMODE To:1 Do Maths:Off Append:Off]
 When this task is called it toggles the SMS and CALLS car modes to on and sets the %CARMODE variable to 1. The variable doesn’t do anything else and never changes, as mentioned above it allows the CALLS Car Mode profile to be permanently active. The only thing left to do is set up the trigger for this task.
Using NFC ReTAG FREE you can associate NFC tags with various activities (including launching Android’s standard car mode directly if you want a basic car mode). Once you’ve scanned your tag you need to assign your activity. The feature you need is within Labs > Tasker Task (advanced) which allows you to call the named task you just set up. If done correctly, scanning your NFC tag will now result in toggling your CALLS and SMS Car Mode profiles.
Remind me why I bothered if I can enable car mode directly from NFC ReTAG?
| Method | Doing nothing | Standard car mode | Enhanced car mode |
| Answering | Swipe | Single poke | Single poke |
| Speakerphone | Single poke | Automatic | Automatic |
| Display sleep | Depends on your setup | Phone will not sleep in car mode (unless you manually turn off screen) | Phone will not sleep in car mode (unless you manually turn off screen) |
| Ringer volume | As set | As set | Specific car options |
| Sat-nav (media) volume |
As set |
As set | Specific car options |
| Speakerphone (in-call) volume | As set | As set | Specific car options |
| Auto respond SMS | No | No | Yes |
| SMS over speakerphone | No | No | Yes |
| Seamless switch back to normal/work volume profiles | No | No | Yes |
To find the apps needed use the links below:
| Tasker | NFC ReTAG FREE |